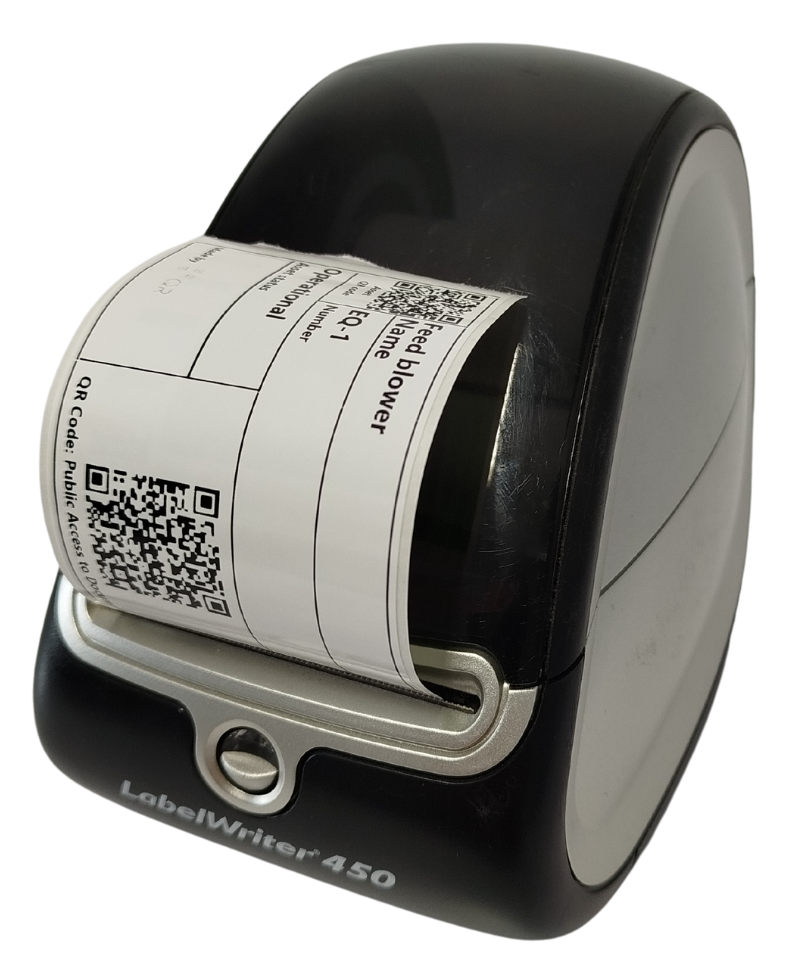
In addition to printing labels containing a QR code from the QRmaint application, you can configure your own label. Manually configuring the label’s appearance allows you to include information that is not available in the QRmaint system but is important for the individual user, such as manually entered texts or pictograms.
ⓘ Note
Before configuring the label, it is necessary to export the data of the asset or assets.
Before configuring the label, it is necessary to export the data of the asset or assets.
Exporting asset data step by step #
- Log in to your QRmaint system administrator account.
- From the main menu, select Assets .
- Go to List view tab
- Set filters as needed.
- Expand the Activities
- Select Export to XLS file (Excel)
- The file will be downloaded and saved to your Downloads folder .

Label setup step by step #
There are many printers available on the market that can print both regular and industrial labels. The printer you use depends on the standard or availability in your organization.
The following describes the label configurations for multiple printers.
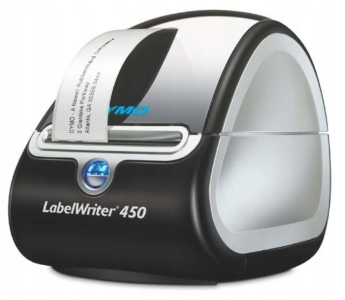
DYMO LabelWriter 450 printer #
- Download and install the DYMO Connect printer software .
- Connect your DYMO LabelWriter 450 printer to your computer.
- Connect the DYMO LabelWriter 450 printer to your network.
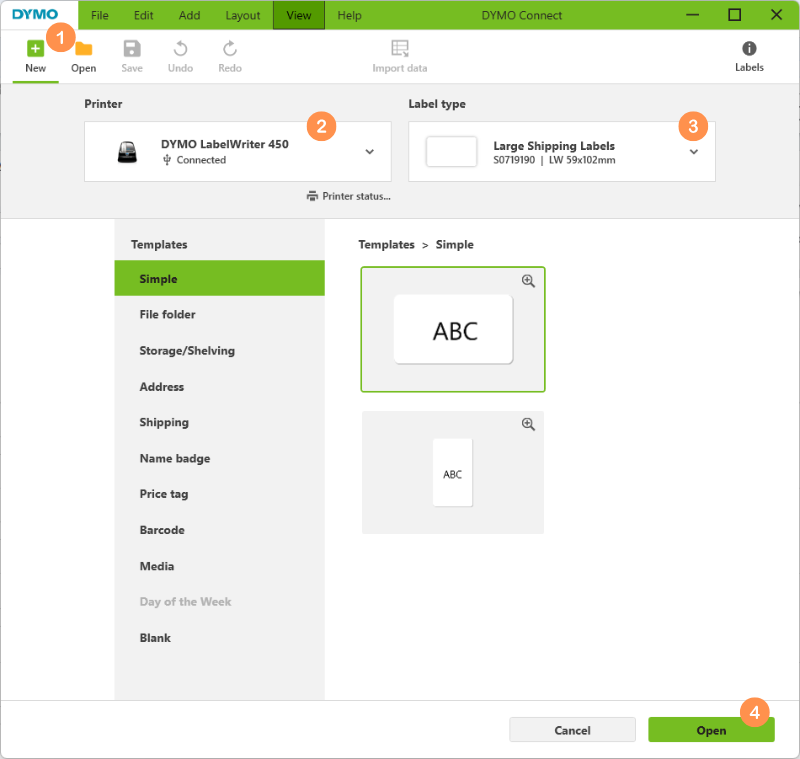
- Launch DYMO Connect .
- Click + New
- In the drop-down list, check/select the appropriate printer
- In the drop-down list, check/select the size and type of labelIn the described case it is a LW 59x102mm label
- Click Open
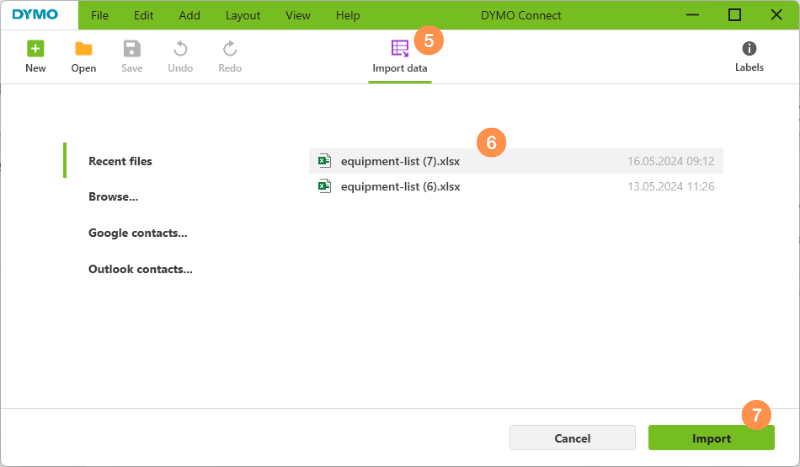
- Click Import Data
- Select the previously exported file
- Click Import
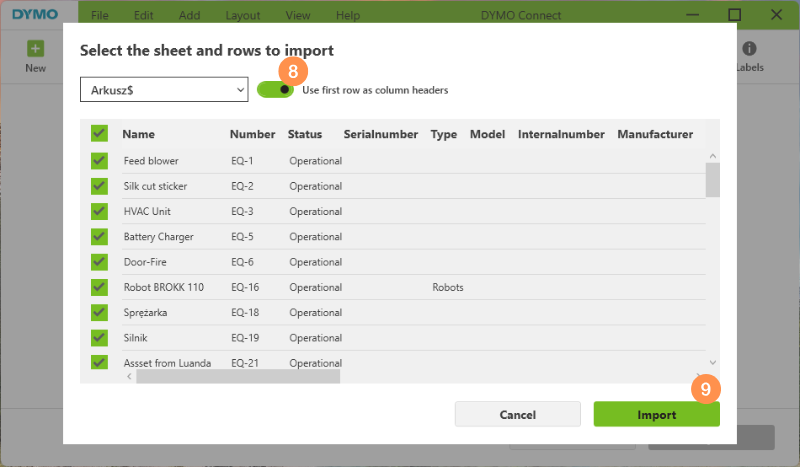
- Check the Use first row as column headers option
- Click Import
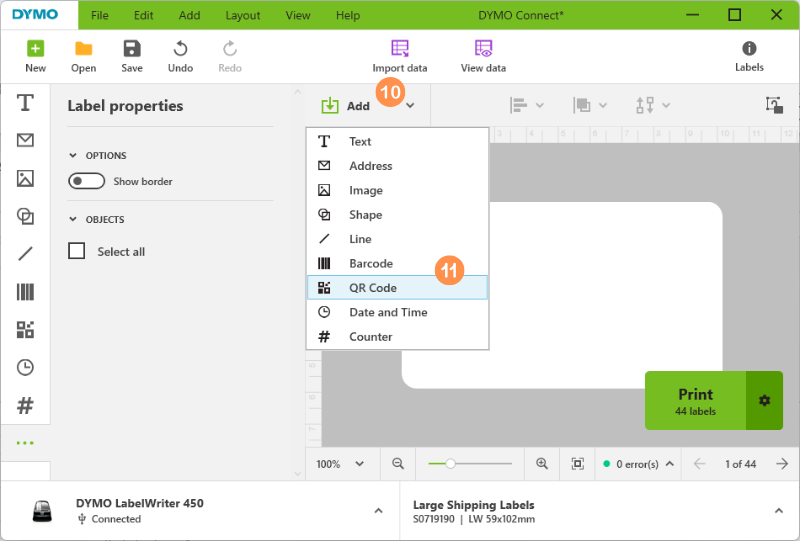
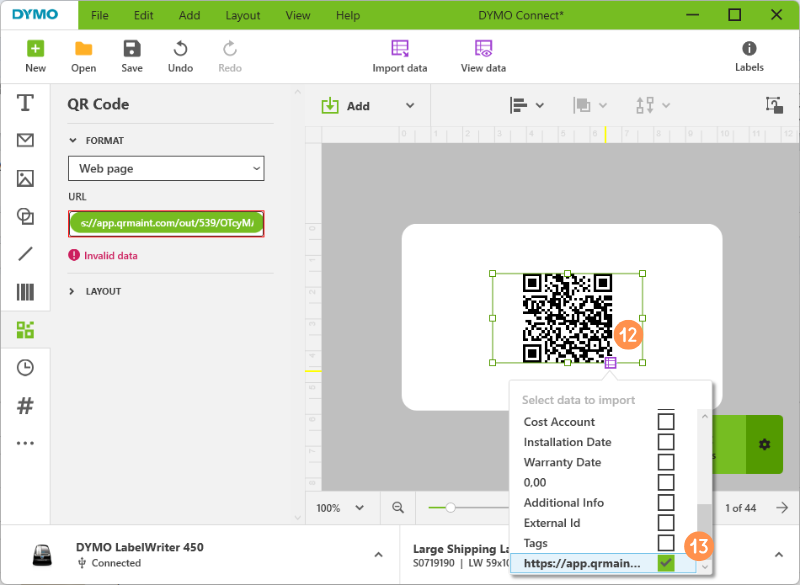
- To add a variable to the label, click Add
- Select the type of variable to be added, e.g. QR code
- Click on the purple square visible around the displayed QR code
- From the drop-down list, select the appropriate variable for the QR code
- You can intuitively edit the entered variable (position on the label, size, border, or justification).
- If you want to add another variable using the imported database, repeat steps 14-18.
- If you want to add a variable, such as text entered manually, follow steps 14-18, skipping steps 16 and 17. In step 18, you can enter any text that will be printed on the label.
