| Platform | ✅ Web ✅ Mobile |
|---|---|
| Plan | ✅ Standard ✅ Professional ✅ Premium |
| User Type | ✅ Administrator ❌ Technician ❌ Limited Technician ❌ Requester ❌ Extended Requester |
Basic settings are the configuration of the QRmaint system, which should be done at the very beginning of use. It will be possible to change the configuration at a later stage of use, but it is important to do the target configuration at the beginning.
Below is a description of what the configuration of the QRmaint system concerns.
Basic settings step by step #
-
- In your web browser, enter the address https://app.qrmaint.com
- Log in to your QRmaint system administrator account.
- In the main menu, select Settings
- Click on System The BASIC settings tab will open . This tab is divided into sections. The description of each section is below.

Detailed description of basic settings. #
Branding #

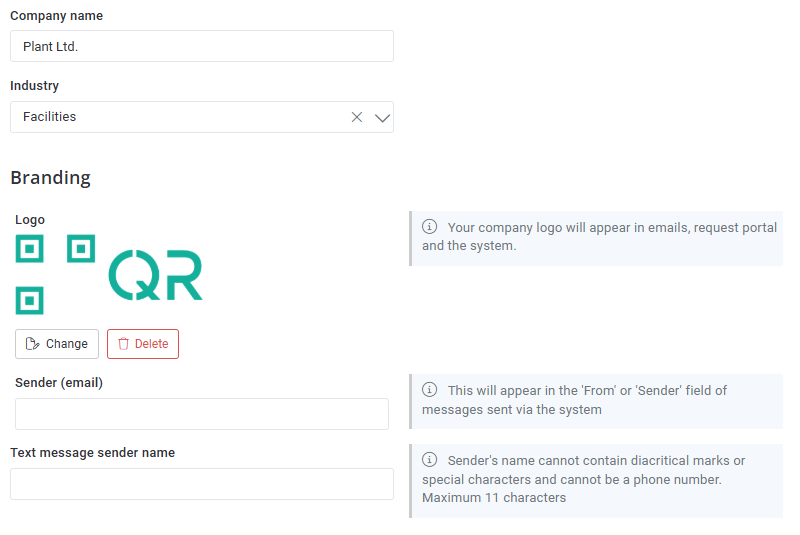
Field name Field Description Company name Enter the name of the company/plant/organization for which you created the account. Industry Select the appropriate industry for your business profile. You can choose from the following industries: manufacturing plant, technical maintenance of real estate, service, chain of stores, public utility institutions such as universities, hospitals, other (if you select other, enter a different industry name in the field next to it) Logo Add your company logo. The added logo will be visible in emails, the ticket portal and in the system. Sender (email) Enter the name you want the recipient of an email sent from the system to see in the “From” or “Sender” field. Text message sender name Enter the name you want the recipient of the SMS message sent from the system to see in the “From” or “Sender” field.
The SMS sender’s name cannot contain Polish letters, special characters and cannot be a phone number. Maximum 11 characters.Application settings #

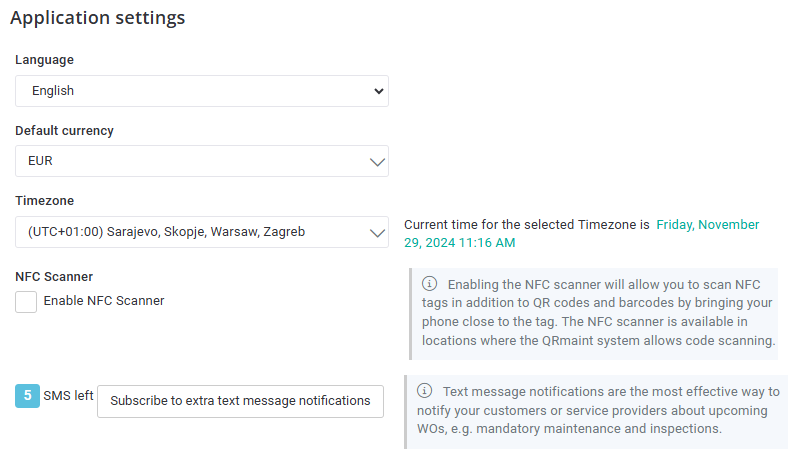
Field name Field Description Language Select the default language for the QRmaint application.
QRmaint is available in the following language versions: Polish, English, German, Turkish, Spanish, Czech and Italian.
The selected language will be the default language for all users assigned from the main account (the account from which the QRmaint system was registered).Default currency Select the default currency from the list. The selected currency will be the currency to which all costs will be calculated, even if an item is entered in a different currency. The system will convert items entered in a different currency to the main currency at the NBP rate from the previous day. Timezone Select the appropriate time zone for your primary location. NFC Scanner Enabling the NFC scanner will allow you to scan NFC tags in addition to QR codes and barcodes by bringing your phone close to the tag. The NFC scanner is available in locations where the QRmaint system allows code scanning. SMS A field informing about the available number of SMS notifications.
SMS notifications are the most effective way to notify your customers or service providers about upcoming work orders, e.g. mandatory inspections.Work Orders #

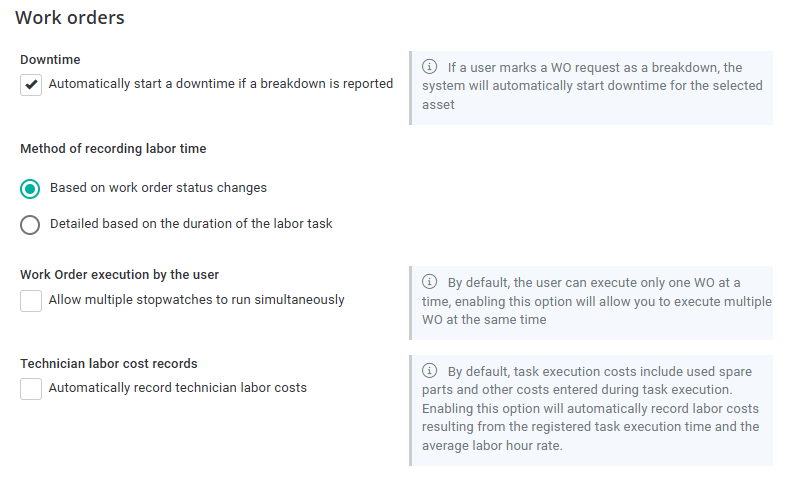
Field name Field Description Downtime Marking field. If the field is marked, the system will automatically start counting downtime for the reported failure. Method of recording labor time Two methods of calculating the work order completion time are available. Select the method adopted by your company.
Based on work order status changes – the work order completion time will be the sum of the work orders “Completion” status times. The work order may be “Paused” so more “Completion” work order statuses are possible.
Detailed based on the duration of work entered in the work order – the work order completion time will be the sum of the work times added to the work order (the “WORK” tab in the work order). If this method is selected, it will be possible to start work time stopwatches in the “Work” tab.Work Order execution by the user Checkbox. By default, the user can only perform one work order (one active stopwatch counting the time of work order completion). Enabling this option will allow multiple work order to be performed at the same time. Technician labor cost records By default, the costs of work order execution include the spare parts used and other costs entered during work order execution. Enabling this option will automatically register labor costs resulting from the registered work order execution time and the average hourly rate. If you want to count the labor costs of your team in work orders, enable this function and enter the average hourly rate. Assets #

Field name Field Description Autonomous Maintenance Marking field. Enable Autonomous Maintenance to allow machine operators to perform simple preventive maintenance work orders, such as cleaning before starting. Set up accounts with the AM Operator role for operators . After enabling AM, an additional AM tab will appear in the device form. In this tab, you can set autonomous maintenance work orders and plan a schedule. You can find a description of the AM configuration here . Spare parts management #

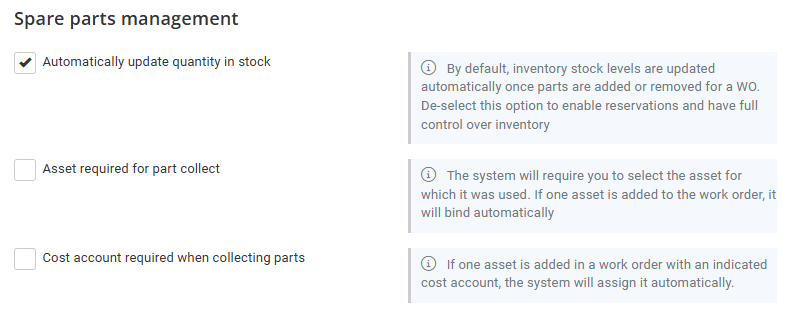
Field name Field Description Automatically update quantity in stock By default, the warehouse status is updated automatically after adding or removing parts used to complete the work order. Uncheck the option to enable the part reservation mode and have full control over its warehouse status. Additional actions will be available in the Warehouse menu: parts to issue and parts to return . The part will not be picked or returned to the warehouse without confirmation of the above actions by the person operating the warehouse. Asset required for part collect If this option is selected, the system will require you to indicate the device for which the downloaded part was used. If the work order concerns one device, the system will automatically assign the downloaded part to that device. Cost account required when collecting parts If the option is selected, the system will require indicating the device with the assigned cost account to which the part being taken was used. If the work order concerns one device with an assigned cost account, the system will assign it automatically. Purchase requests #

Field name Field Description Show stock levels when adding items from inventory Marking field. If the field is marked, the person making a request for a part from the warehouse will not see the stock status. ⓘ Tip
This option is useful when external users use our warehouse and we want to block the view of our warehouse status.Integrations #

Field name Field Description SMSAPI.PL integration Marking field. Mark this field if you want to send text messages from the QGmaint system via SMSAPI.PL. Work schedule #

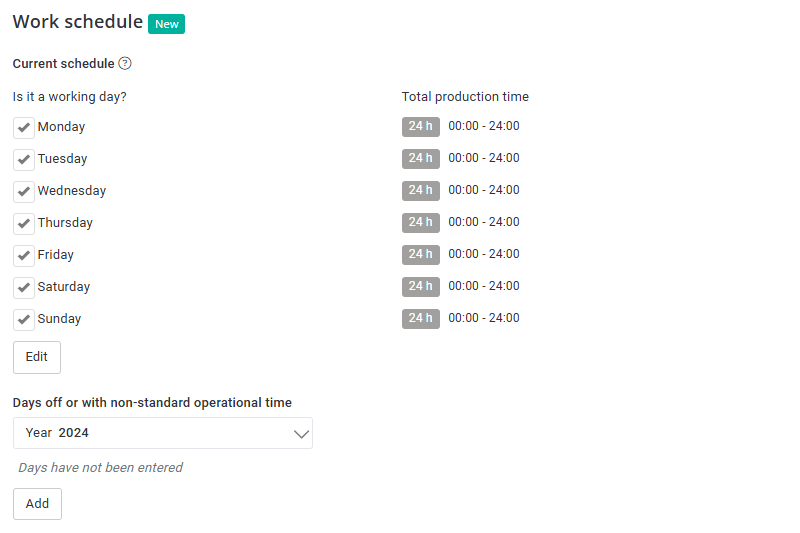
Field name Field Description Current schedule Click the Edit button and set your plant’s work schedule. You can edit or add new schedules if your plant’s working hours change. ⓘ Tip
Set up a plant operation schedule if you want to track KPIs such as MTTR, MTBF, availability and unavailability (failure rate) of equipment, production lines or production areas.Days off or with non-standard operational time Click the Add button and set the days on which your plant’s work schedule differs from the main schedule (incidental single-shift work or days off).

